Tuesday, December 7, 2021

Board Number 6

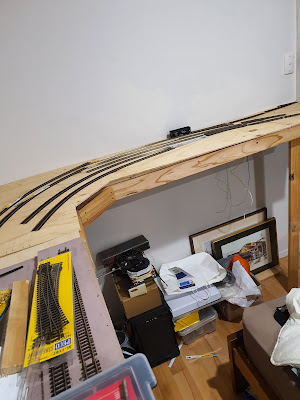
 Finally board Number 6 has been reached. This board connect to the long board 5 and is where the tracks fan out after crossing the liftout section across the door. There is also the need to lower the tracks down to zero level to match up with the level across on board number 1.

This meant the grade had to start lowering or raising dependent on direction at the end of board 5 just before coming around the 90 degree corner. This lead to some awkward carpentry but it worked out okay.


Board No 6 is secured into place

This baseboard has been made and bolted to board 5 the long straight. Towards the door it was necessary to actually screw into the timber of the doorway. This was to hold this board in place as it was to hold the liftout section across the doorway and I didn't want any extra movement. A single leg is sufficient to hold the rest up.


Boards 5 and 6 finally joined

As can be seen in the above photos I have continued to use cork under the main line but not the relief or other sidings. This also helps define the mains from the other tracks visually and they will be ballasted. Printed circuit boards have also been placed across the joints. It is proposed to solder the rails to the pc board but not cut at this stage. That will happen one day when the need for dismantling takes place.


Trial laying of the tracks

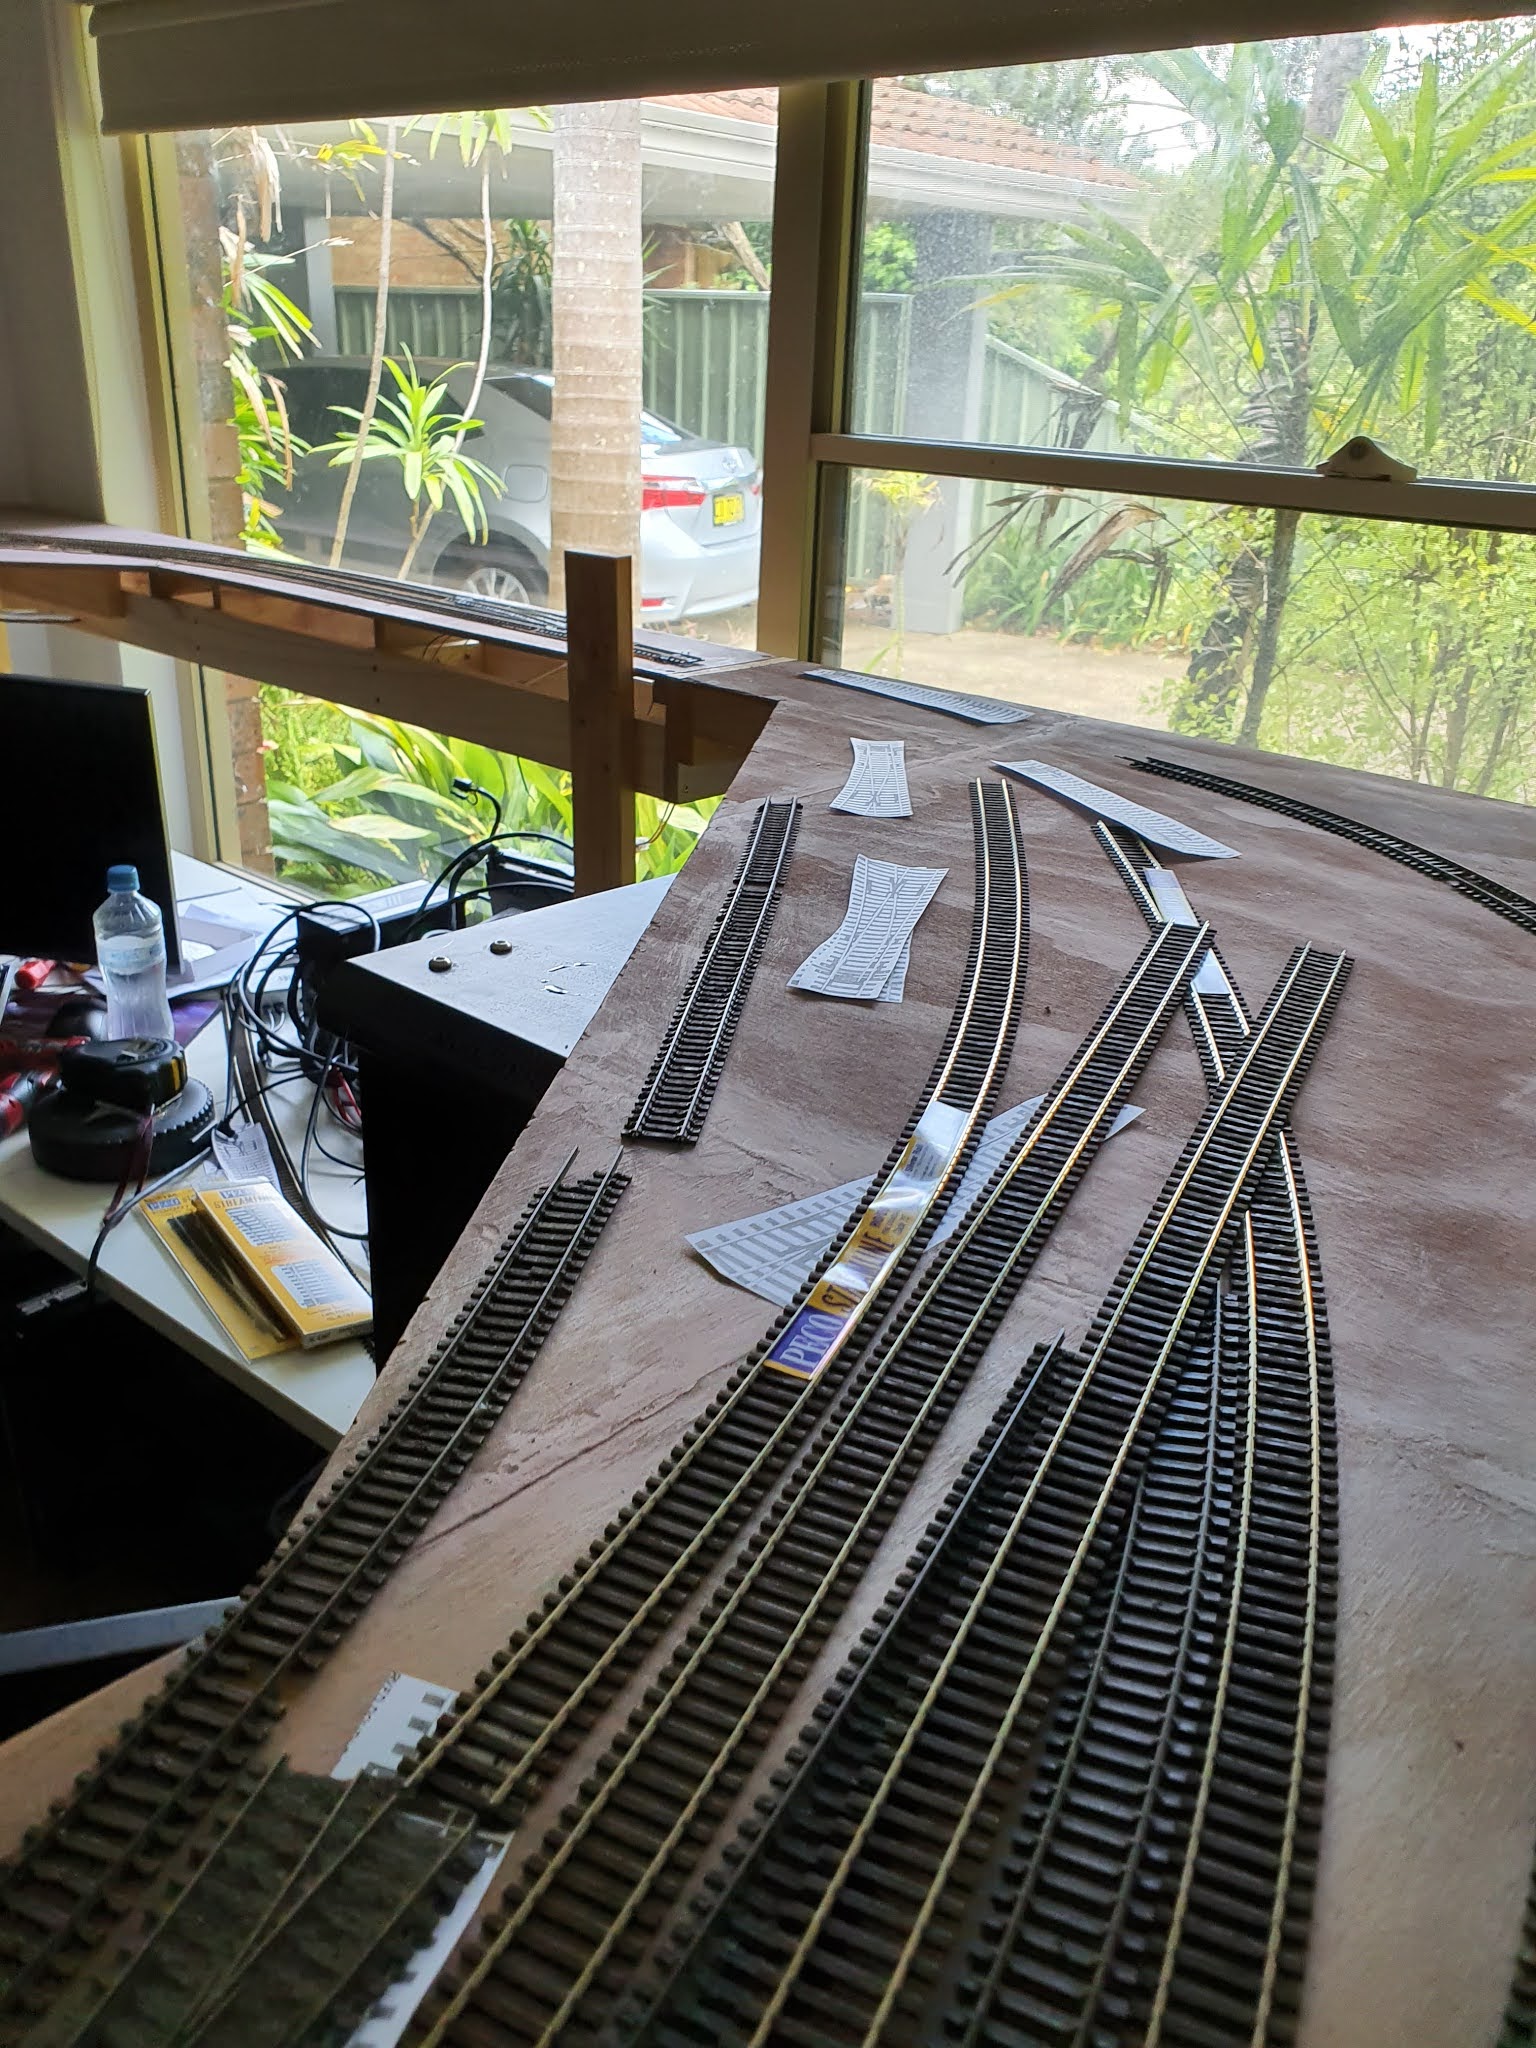
Before any track is secured down, loose lengths of track and paper points are laid out to visualise how it will all go and more importantly - fit.

It is intended to fit a coal siding on the track closest to the wall. This track veers slightly away from the main to give room for a coal loader, what it will eventually be or look like is anyones guess at this time. There is a shunting neck at the end of the loop as can be seen in the  photo above. This coal siding can be accessed from either direction so it is possible for coal trains to be run either way.


Pardon the mess but we are getting there

Peco curves points are put to good use on this layout. Straight points just wouldn't work and there is also something nice about the flowing curve using curved points. The points on the board have been all motored and controlled from a panel at the start of board 5 near the window.


With the mess gone the board start to look a lot better, don't worry it was only removed for the photo. Another job to do is the insertion of the missing sleepers, there always seem to be plenty hanging around. They also come in handy as spacers to get the tracks completely parallel. It seems a sleeper width is enough to give two tracks plenty of clearance.


So the basics are done and it just needs the liftout section to be done to complete the full circuit. Although the liftout section will be the smallest board the tolerances will be critical.

So we will let you know how it goes when it is done.


Saturday, October 23, 2021

The Long Board

 As mentioned in the previous blog Board No 5 is a long 3.2m baseboard that has the mains and relief roads plus two roads for storage. Mid way down the board is a crossover that takes the outside track to a future loader for the coal train.

Just the shear length of this long board seemed to chew through a box of track in no time. Some second hand track was available and this was used mainly in the sidings, leaving the new for the mains and relief lines. Once the outer track for the relief line that leads into the coal siding was laid it was just a matter of equal spacing the next set of tracks towards the front. I used offcut Peco track sleepers as spacers and also a 600mm ruler to ensure the track was straight.

So it was fairly straight forward doing this board and won't require a lot of scenery work to complete it. It is planned just to have the ballast for the mains and dirt for the sidings. A line of telegraph poles will probably complete this section.

Here is a series of photos that shows the progress on baseboard No 5.

Track laying on board 5 has begun

You need a straight edge to get straight track

Railmotor is sitting inside the coal siding

The two steam locos so far on the layout

Looking down board 5

Track is all laid on Baseboard 5

42220 heads out of the coal siding with a train


Sunday, September 5, 2021

The Home straight

 The corner track that sits over the server has virtually been laid. On the inside corner will sit a two road container depot sidings. The head shunt for these two sidings will come off two dead end roads that run down the inside of the long baseboard that sits on the opposite side of the room from the loco area. The photo below shows how the tracks will be laid out. This will also form the control panel for the points on this side. It has been decided that only the crossover and points to the loops will be powered. Other siding will be hand operated as they are within close reach of the edge.

Schematic for freight sidings

The control panel shows that there will be seven tracks across the long section of baseboard. Unlike the two separate baseboards that form the loco area on the opposite side, this baseboard is just over three metres long. This is partly due to the fact that a bed needs to fit in the room somewhere and the less legs there the better. Once again these boards were constructed outside where there were no obstructions. Pine was used for the framework which is easy to work with. The top was fitted with ply and painted to seal the surface. The colour was just left over house paint and colour was irrelevant as it will eventually be covered up.
Frame work constructed

Top is covered with ply and painted


The corner module was taken outside once again and laid up against the long baseboard No 5. This was done so that the tracks could be laid over the two boards to see how the track layout will go. The tracks leading to the container depot will start on board 5 and cross the join between boards 4 and 5. The only way to get the right positioning for this was to have the boards sitting together and the only place at this stage was outside. The adjoining tracks on baseboard 4 in the corner needed baseboard 5 to be finished and set up to be able to run the tracks across the joint. This allowed positioning of the printed circuit board under where the tracks would eventually be soldered and cut for removal one day.

Setting out the tracks to see how it all fits

Looking down the long board No 5
As can be seen in the photos the tracks into the container depot come off the Down Through road. This will mean to shunt this siding there can't be any train in this road to block access. These sidings will provide some interesting shunting and take away the boredom of just going around in circles. If there is a container train running anti clockwise then it will need for the locos to run around and then shunt the train into the various roads, any overflow container wagons will need to be placed in other siding to wait their turn to be loaded/unloaded.

Container train on the other hand running clockwise will just use the crossover on board 4, run into the down through road and then shunt back into the sidings. So two scenarios for the two directions.

Track laying progresses
Once I was happy with how the track went across the joins and the baseboard had it coat of paint, legs were made and the board moved into the room to be butted up against board 4. At this stage looking around the room is was good to see how the layout was progressing and after the tracks are laid on this board there is only one other board plus the liftout section to go.

The first track to be laid across the join was the Up relief track. This then allowed the remaining tracks towards the edge to use this track for spacing. The spacing was done using many offcut sleepers as spacers, this seemed to work well in conjunction with a long steel ruler. You often see layouts with track all over the place and not straight, how hard is it to use a straight edge and make it look right?

Tracks are finally laid across the join and onto board 5
The above photo shows how all the tracks fan out across the two boards. As it was not possible to extend baseboards into the centre of the room it was necessary to have long storage roads along the long wall. And having this baseboard so long meant one set of joins and legs less which had to be good. The use of the diamond crossing adds some interest to the trackwork and I thinks looks good. You can also see the microswitches installed to provide power to the frogs. They will be eventually covered with scenery when that stage is ready.

Saturday, August 7, 2021

In the corner

 After constructing the relatively easy two track narrow section that is situated at the rear of the monitors on the desk, the next section is also custom made to fit above a computer server. This is also where the layout will reach the maximum height which also allows a grade to be built. 

This board is designed on the corner to fan out from the double track across the join to a multi track yard that will run the length of the room and provide tracks for storage, an up and down relief road. Also two industry sidings have been provided into the corners. One will be for cement wagons and the other for a private industry. It is planned to serve louvre vans and will take about two wagons. And in the inside corner it is planned a container depot with two dead end sidings. The head shunt for these will require that siding to be vacant so that the container wagons can be divided and shunted into the two tracks. As there are currently more container wagons than the sidings can hold it will be necessary to hold the overflow in the storage sidings until the others have been unloaded or loaded and then shunted into position. This all adds to the operation interest.

Corner baseboard has been made


The corner board

All lined up for a feed

A ritual that happens from morning until dark is the feeding of king parrots where bowls of sunflower seeds are put out once their squaking is heard. There have been up to 14 at a time and it is true what they say about the 'pecking order' They will move around the bowls and squak at each other until they finally settle down and start eating. Naturally when they come all work on the layout stops as they have priority.
A male king parrot gets his lunch

Dry fitting where the tracks might go

Now connected to the previous section
As each baseboard is constructed outside it is then painted, gaps filled, sanded and then moved inside and if ready is bolted to the previous section. Legs are provided where required as some baseboards share a set of legs.

To get the feel of where the tracks will go a set of Peco point templates were printed and then put into place on the board. Doing it this way makes it easy to see what type of point is required without actually buying them initially. Old lengths of track from a previous layout can be bent into place to see how it all fits.

It is intended to lay the main line with cork sheet under. This is so the main can have a shoulder of ballast and be higher that the yard tracks and easily provide some distinction between them. It is intended to just use dirt around the yard tracks. If you observe yard tracks on the real thing ballast is not used.

This shot show the tracks on the corner board

After some time the tracks were finally laid on the corner board. The above photo shows how the tracks fan out from the two tracks at the top of the photo. The container depot tracks haven't been laid in as yet as can be seen they will come off the next baseboard to be built. It has been decided that only the major points on this side of the room will be controlled by point motor with the points to the sidings to be finger operated. They are within easy reach and will only need moving when shunting takes place.

Trackwork nearly complete


Cement plant and industry building in place

The above photo shows the two buildings for the cement and industry sidings. It is planned to heavily weather the cement plant. Although it may not properly represent a cement plant once it is weathered I think it will look the part. The other building is a leftover from another layout and is designed as a low relief structure and will go up against the wall of the room.


Looking back to the previous board. The join can be seen.

The Peco point motors are installed on the main line points and will be controlled from a panel which will be attached to the next baseboard.
So with the build of this board this represents about half way on the build, a lot more to go.

Thursday, July 8, 2021

The Skinny Bit

 The first two boards have been constructed and the tracks laid. It is time now to move onto the third baseboard. Other than the liftout section this is the smallest baseboard. The design is critical as it needs to run around the back of the desk that has monitors in front. There is a ninety degree corner and the board runs across the window. This baseboard has a grade on it as it climbs up towards the server and that baseboard will then turn another ninety degrees to run down the opposite wall.

Roughing it all out

Construction takes place outside as usual
The whole layout could have been built flat but it was decided to incorporate a grade to add more interest. There was no ply on hand to form the top of this board but some 10mm mdf was available and painted on both sides to protect it when the ballast is laid and hopefully stop any swelling, time will tell.

The first corner baseboard constructed

As this corner baseboard runs above the desk it wasn't possible to run the legs to the floor and shorter legs resting on the desk were used. The first fitting showed it would work Ok and the middle monitor fitted into the corner leaving room for the other two monitors on either side.

Stumpy legs

Curved monitor fits in nicely

After the dry fit over the desk the baseboard was again taken outside for the track laying. The cork was glued down and more Peco code 75 was laid down. The radius is 27" using  a plastic curved track gauge to get a constant curve. I couldn't resist placing a train on the track to see how it all looks. I am not sure what will go into the corner yet as it seems wasted space where an industry could be situated but would be a fair reach over the desk if something goes wrong in the siding, so for now it will remain a space to be filled later.

There will also be a facing crossover which will enable trains on the outside to come to the inner tracks and the corner which will have the container sidings as well. Tracks are fitted to a section of printed circuit board at the edges and after the boards are bolted together then the tracks can be cut.

First train?

Crossover to inner tracks
The wiring was completed and the bus wire carried around underneath ready for the next section. The two point motors were also installed under the crossover.
Track laying complete

This was a relatively simple build but the next board will have a few industries and is also where the tracks split up into relief roads, dead end sidings and also the container depot.

You can refer to the track diagram that was published a few entries ago if you want to refresh where this is all going.

Sunday, June 6, 2021

Turntable Area

 This layout was originally only intended to be a shelf layout to showcase the locos and to be able to show them off in  layout surroundings rather than a plain shelf in a showcase. Eventually if you have a showcase the number of locos soon surpasses the available shelf space.

The design was to have loco servicing to suit both steam and diesel although at this stage only two NSW steam locos exist that being a Trainorama 32 class that has been weathered and sound equipped and a Eureka 60 class garratt also sound and weathered.

It was always intended to have a turntable for the layout and the search for a suitable one was started.

Area for a turntable??

The horse was put before the cart and the baseboard width was guesstimated to accommodate a suitable turntable. It looked big enough when the strainer from the kitchen was placed on the board. It wasn't urgent to have a turntable straight away knowing a hole can be cut in when it turned up.
The great find

Now way back when we used to have things called model railway exhibitions a visit to the Castle Hill exhibition way back in 2019 and it was on the Sunday a visit to the second hand stall revealed this Fleishmann turntable still available. These generally go for around $600+ so for only $175 I took a chance and hoped for the best when I got home. Finally a turntable was obtained for the loco area but when it was taken out of the box and placed on the layout there was a virtual overhang around one edge, not really suitable for storing locos on. This turntable also included an extra box of add on tracks which can increase capacity by replacing the plain grey segments with ones containing rail. So a super bargain.
Test fit for the turntable

As the photo above shows either the turntable is too big or the layout is not wide enough. It was decided to add extra width to the board so the turntable can be surrounded by tracks.


Loco storage area expanded
The only way to provide extra space was to add on more timber to widen the existing baseboard. This was fairly simple to achieve. The hole was cut for the turntable to sit into and although not a perfect circle was cut, the edge covered up any blemishes. There would be two entry roads onto the turntable.

The turntable finally settled into the baseboard

Turntable is connected up to the loco roads.

The photo above shows the additional baseboard width attached. The gap will be filled and the raw timber painted to match the rest. It was not critical to paint the baseboard but it gives a uniform surface to work with and also helps when the ballast is applied the ply board won't absorb as much water.
All storage roads in place.

As can be seen in the above photo with the additional baseboard width now twelve roads for loco storage have been provided. The two roads that run straight across the turntable will be utilised for the 60 class garratt storage as the loco is too long for the turntable but all other locos can fit and will be able to use and of the other roads. Some roads that are longer will be able to hold up to two locos.
Frog juicer fitted under to reverse turntable polarity

First locos try out the table

So basically the turntable is in place, the storage roads are wired up and ready to go. This area will be revisited in the future for more work to be carried out but for now it all works.